Preparation
Setting Up Your Environment
Before we start building our WebSocket application, let’s set up the development environment with all the necessary tools and dependencies.
Prerequisites
Make sure you have the following installed:
Python 3.11+ - Fast Channels requires Python 3.11 or higher
Docker - For running Redis locally
uv (recommended) or pip - For package management
Creating Your Project
First, create a new directory for your tutorial project:
mkdir tutorial-project
cd tutorial-project
Now create the main project structure with a sandbox directory for your source code:
mkdir sandbox
This structure matches the Fast Channels repository layout, where sandbox is the source directory at the same
level as pyproject.toml.
Installing Dependencies
You’ll need several packages for this tutorial. Choose your preferred package manager:
Option 1: Using uv (Recommended)
# Create a virtual environment with seed packages
uv venv --seed

# Activate the virtual environment
source .venv/bin/activate  # On Windows: .venv\Scripts\activate

# Add the required dependencies
uv add fastapi "fast-channels[redis]" rq "uvicorn[standard]"
Option 2: Using pip
# Create a virtual environment
python -m venv .venv

# Activate it
source .venv/bin/activate  # On Windows: .venv\Scripts\activate

# Install dependencies
pip install fastapi "fast-channels[redis]" rq "uvicorn[standard]"
Required Dependencies Explained:
fastapi - Modern ASGI web framework for building APIs
fast-channels[redis] - Fast Channels with Redis channel layer support
rq - Redis Queue for background job processing
uvicorn[standard] - ASGI server for running FastAPI applications
Setting Up Redis with Docker
Redis is required for channel layers in production. We’ll use Docker Compose to run Redis locally.
Create a docker-compose.yml file in your project root directory (tutorial-project/):
services:
  redis:
    image: redis:7
    ports:
      - "6399:6379"
    networks:
      - fast-channels

networks:
  fast-channels:
    driver: bridge
Note: We’re using port 6399 instead of the default 6379 to avoid conflicts with any existing Redis installations.
Start Redis:
docker compose up -d
You can verify Redis is running:
docker compose ps
Project Structure
Create the basic project structure:
mkdir -p sandbox/static/css sandbox/static/js
touch sandbox/__init__.py sandbox/main.py
Your project structure should look like this:
tutorial-project/
├── docker-compose.yml
└── sandbox/
    ├── __init__.py
    ├── main.py
    └── static/
        ├── css/
        └── js/
Basic FastAPI Application
Create a basic FastAPI application in sandbox/main.py:
"""
FastAPI WebSocket Chat Demo - Template Base

This template provides a starting point for building WebSocket chat applications
with fast-channels. Follow the comments to add your own consumers and features.
"""

from fastapi import APIRouter, FastAPI
from fastapi.responses import HTMLResponse
from fastapi.staticfiles import StaticFiles

# TODO: Import your consumers here (uncomment as needed)
# from sandbox.apps.system_chat.consumer import SystemMessageConsumer
# from sandbox.apps.room_chat.consumer import RoomChatConsumer
# from sandbox.apps.background_jobs.consumer import BackgroundJobConsumer
# from sandbox.apps.showcase.consumer import (
#     AnalyticsConsumer,
#     ChatConsumer,
#     NotificationConsumer,
#     ReliableChatConsumer,
# )

# TODO: Import and setup your channel layers
# from sandbox.layers import setup_layers
# setup_layers()

app = FastAPI()

# Mount static files
app.mount("/static", StaticFiles(directory="sandbox/static"), name="static")

# ----------------- HTML Client -----------------
html = """
<!DOCTYPE html>
<html>
    <head>
        <title>WebSocket Chat Demo</title>
        <link rel="stylesheet" href="/static/css/style.css">
    </head>
    <body>
        <h1>WebSocket Chat Demo</h1>
        <button class="analytics-btn" onclick="sendAnalyticsEvent()">Send Analytics Event</button>

        <div class="chat-container">
            <!-- System Messages Chat Box -->
            <div class="chat-box system-chat">
                <h3>System Messages (No Layer)</h3>
                <form class="input-form" onsubmit="sendSystemMessage(event)">
                    <input type="text" id="systemMessageText" placeholder="Type system message..." autocomplete="off"/>
                    <button type="submit">Send</button>
                </form>
                <ul id='systemMessages' class='messages'></ul>
            </div>

            <!-- Room Chat Box -->
            <div class="chat-box room-chat">
                <h3>Room Chat</h3>
                <div class="room-controls">
                    <input type="text" id="roomName" placeholder="Enter room name..." autocomplete="off"/>
                    <button onclick="connectToRoom()" id="connectBtn">Connect</button>
                    <button onclick="disconnectFromRoom()" id="disconnectBtn" style="display:none;">Disconnect</button>
                </div>
                <div id="currentRoom" style="margin: 10px 0; font-weight: bold;"></div>
                <form class="input-form" onsubmit="sendRoomMessage(event)">
                    <input type="text" id="roomMessageText" placeholder="Type room message..." autocomplete="off" disabled/>
                    <button type="submit" disabled>Send</button>
                </form>
                <ul id='roomMessages' class='messages'></ul>
            </div>

            <!-- Background Job Processing Chat Box -->
            <div class="chat-box job-chat">
                <h3>Background Job Processing</h3>
                <div class="job-controls">
                    <select id="jobType">
                        <option value="default">Default Processing</option>
                        <option value="translate">Translation</option>
                        <option value="analyze">Text Analysis</option>
                        <option value="generate">AI Generation</option>
                    </select>
                </div>
                <form class="input-form" onsubmit="sendJobMessage(event)">
                    <input type="text" id="jobMessageText" placeholder="Type message for processing..." autocomplete="off"/>
                    <button type="submit">Process</button>
                </form>
                <ul id='jobMessages' class='messages'></ul>
            </div>

            <!-- All Layers Combination Chat Box -->
            <div class="chat-box regular-chat">
                <h3>Showcase</h3>
                <form class="input-form" onsubmit="sendMessage(event)">
                    <input type="text" id="messageText" placeholder="Type message..." autocomplete="off"/>
                    <button type="submit">Send</button>
                </form>
                <ul id='messages' class='messages'></ul>
            </div>
        </div>

        <script src="/static/js/main.js"></script>
    </body>
</html>
"""

home_router = APIRouter(tags=["home"])


@home_router.get("/")
async def home():
    return HTMLResponse(html)


app.include_router(home_router)

# ----------------- WebSocket Sub-App -----------------
ws_router = FastAPI()

# TODO: Add your WebSocket routes here
# Example routes:
# ws_router.add_websocket_route("/system", SystemMessageConsumer.as_asgi())
# ws_router.add_websocket_route("/room/{room_name}", RoomChatConsumer.as_asgi())
# ws_router.add_websocket_route("/backgroundjob", BackgroundJobConsumer.as_asgi())
# ws_router.add_websocket_route("/chat", ChatConsumer.as_asgi())
# ws_router.add_websocket_route("/reliable", ReliableChatConsumer.as_asgi())
# ws_router.add_websocket_route("/notifications", NotificationConsumer.as_asgi())
# ws_router.add_websocket_route("/analytics", AnalyticsConsumer.as_asgi())

app.mount("/ws", ws_router)
This creates a basic FastAPI application with static file serving and a simple HTML page to get you started.
Adding JavaScript Functionality
Create the JavaScript file at sandbox/static/js/main.js to handle WebSocket connections and user interactions:
JavaScript content
// FastAPI WebSocket Chat Demo - Main JavaScript
// All functionality combined in a single file for simplicity

// =============================================================================
// WebSocket Connections
// =============================================================================

// WebSocket connections for different layer types
var wsChat = new WebSocket("ws://localhost:8080/ws/chat");
var wsNotifications = new WebSocket("ws://localhost:8080/ws/notifications");
var wsReliable = new WebSocket("ws://localhost:8080/ws/reliable");
var wsAnalytics = new WebSocket("ws://localhost:8080/ws/analytics");
var wsSystem = new WebSocket("ws://localhost:8080/ws/system");
var wsBackgroundJob = new WebSocket("ws://localhost:8080/ws/backgroundjob");
var wsRoom = null; // Dynamic room connection

// =============================================================================
// WebSocket Event Handlers
// =============================================================================

// Handle chat messages
wsChat.onmessage = function(event) {
    addMessage("Chat: " + event.data, "chat");
};

// Handle notifications (JSON format)
wsNotifications.onmessage = function(event) {
    try {
        var data = JSON.parse(event.data);
        addMessage("Notification: " + data.message, "notification");
    } catch (e) {
        // Fallback for non-JSON messages
        addMessage("Notification: " + event.data, "notification");
    }
};

// Handle reliable messages
wsReliable.onmessage = function(event) {
    addMessage("Reliable: " + event.data, "reliable");
};

// Handle analytics messages
wsAnalytics.onmessage = function(event) {
    addMessage("Analytics: " + event.data, "analytics");
};

// Handle system messages
wsSystem.onmessage = function(event) {
    addSystemMessage(event.data);
};

// Handle background job messages (JSON format)
wsBackgroundJob.onmessage = function(event) {
    try {
        var data = JSON.parse(event.data);
        var message = data.message || event.data;

        // Add status indicator for different types of responses
        if (data.status === "queuing") {
            addJobMessage("⏳ " + message);
        } else if (data.status === "queued") {
            addJobMessage("📋 " + message + " (ID: " + data.job_id + ")");
        } else if (data.status === "error") {
            addJobMessage("❌ " + message);
        } else if (data.type === "job_result") {
            addJobMessage("✅ " + message);
        } else {
            addJobMessage(message);
        }
    } catch (e) {
        // Fallback for non-JSON messages
        addJobMessage(event.data);
    }
};

// =============================================================================
// Utility Functions - Message Display
// =============================================================================

function addMessage(text, type) {
    var messages = document.getElementById('messages');
    var message = document.createElement('li');
    message.className = type;
    var content = document.createTextNode(text);
    message.appendChild(content);
    messages.appendChild(message);
    messages.scrollTop = messages.scrollHeight;
}

function addSystemMessage(text, isUserMessage = false) {
    var messages = document.getElementById('systemMessages');
    var message = document.createElement('li');
    message.className = isUserMessage ? 'user-message' : 'system';
    var content = document.createTextNode(text);
    message.appendChild(content);
    messages.appendChild(message);
    messages.scrollTop = messages.scrollHeight;
}

function addRoomMessage(text) {
    var messages = document.getElementById('roomMessages');
    var message = document.createElement('li');
    message.className = 'room';
    var content = document.createTextNode(text);
    message.appendChild(content);
    messages.appendChild(message);
    messages.scrollTop = messages.scrollHeight;
}

function addJobMessage(text) {
    var messages = document.getElementById('jobMessages');
    var message = document.createElement('li');
    message.className = 'job';
    var content = document.createTextNode(text);
    message.appendChild(content);
    messages.appendChild(message);
    messages.scrollTop = messages.scrollHeight;
}

// =============================================================================
// System Chat Functions
// =============================================================================

function sendSystemMessage(event) {
    var input = document.getElementById("systemMessageText");
    var message = input.value;

    if (message.trim() === '') return;

    // Show user message first
    addSystemMessage("👤 User: " + message, true);

    // Send to system WebSocket connection
    if (wsSystem.readyState === WebSocket.OPEN) {
        wsSystem.send(message);
    }

    input.value = '';
    event.preventDefault();
}

// =============================================================================
// Room Chat Functions
// =============================================================================

function connectToRoom() {
    var roomName = document.getElementById("roomName").value.trim();
    if (roomName === '') {
        alert('Please enter a room name');
        return;
    }

    // Close existing room connection if any
    if (wsRoom) {
        wsRoom.close();
    }

    // Create new room WebSocket connection
    wsRoom = new WebSocket("ws://localhost:8080/ws/room/" + roomName);

    wsRoom.onopen = function() {
        document.getElementById("currentRoom").textContent = "Connected to room: " + roomName;
        document.getElementById("connectBtn").style.display = "none";
        document.getElementById("disconnectBtn").style.display = "inline";
        document.getElementById("roomMessageText").disabled = false;
        document.querySelector("#roomMessageText").nextElementSibling.disabled = false;
    };

    wsRoom.onmessage = function(event) {
        addRoomMessage(event.data);
    };

    wsRoom.onclose = function() {
        document.getElementById("currentRoom").textContent = "";
        document.getElementById("connectBtn").style.display = "inline";
        document.getElementById("disconnectBtn").style.display = "none";
        document.getElementById("roomMessageText").disabled = true;
        document.querySelector("#roomMessageText").nextElementSibling.disabled = true;
    };
}

function disconnectFromRoom() {
    if (wsRoom) {
        wsRoom.close();
        wsRoom = null;
    }
}

function sendRoomMessage(event) {
    var input = document.getElementById("roomMessageText");
    var message = input.value;

    if (wsRoom && wsRoom.readyState === WebSocket.OPEN && message.trim() !== '') {
        wsRoom.send(message);
    }

    input.value = '';
    event.preventDefault();
}

// =============================================================================
// Background Jobs Functions
// =============================================================================

function sendJobMessage(event) {
    var input = document.getElementById("jobMessageText");
    var message = input.value;
    var jobType = document.getElementById("jobType").value;

    if (message.trim() === '') return;

    if (wsBackgroundJob.readyState === WebSocket.OPEN) {
        // Send structured message for different job types
        var jobData = {
            type: jobType,
            content: message
        };
        wsBackgroundJob.send(JSON.stringify(jobData));
    }

    input.value = '';
    event.preventDefault();
}

// =============================================================================
// Showcase Functions (All Layers)
// =============================================================================

function sendMessage(event) {
    var input = document.getElementById("messageText");
    var message = input.value;

    // Send to all WebSocket connections
    if (wsChat.readyState === WebSocket.OPEN) {
        wsChat.send(message);
    }
    if (wsReliable.readyState === WebSocket.OPEN) {
        wsReliable.send(message);
    }

    input.value = '';
    event.preventDefault();
}

// =============================================================================
// Analytics Functions
// =============================================================================

function sendAnalyticsEvent() {
    if (wsAnalytics.readyState === WebSocket.OPEN) {
        var event = {
            type: "page_view",
            timestamp: new Date().toISOString(),
            user_agent: navigator.userAgent,
            url: window.location.href
        };
        wsAnalytics.send(JSON.stringify(event));
    }
}

// =============================================================================
// Initialization
// =============================================================================

// Send analytics event on page load
window.onload = function() {
    setTimeout(function() {
        sendAnalyticsEvent();
    }, 1000); // Wait 1 second for connection
};
This JavaScript file provides all the WebSocket connection handling, message sending, and UI interactions needed for the tutorial application.
Adding Basic Styles
Create a basic CSS file at sandbox/static/css/style.css:
CSS content
* {
    box-sizing: border-box;
    margin: 0;
    padding: 0;
}

body {
    font-family: -apple-system, BlinkMacSystemFont, 'Segoe UI', sans-serif;
    background: #fafafa;
    padding: 20px;
    color: #333;
}

h1 {
    text-align: center;
    color: #2d3748;
    font-size: 2em;
    margin-bottom: 20px;
    font-weight: 600;
}

.analytics-btn {
    display: block;
    margin: 0 auto 30px;
    background: #4a90e2;
    color: white;
    border: none;
    padding: 10px 20px;
    border-radius: 6px;
    font-size: 14px;
    font-weight: 500;
    cursor: pointer;
    transition: background-color 0.2s;
}

.analytics-btn:hover {
    background: #357abd;
}

.chat-container {
    display: grid;
    grid-template-columns: repeat(2, 1fr);
    gap: 20px;
    max-width: 1400px;
    margin: 0 auto;
}

.chat-box {
    background: white;
    border-radius: 8px;
    padding: 20px;
    border: 1px solid #e0e0e0;
    box-shadow: 0 1px 3px rgba(0,0,0,0.05);
}

.system-chat {
    border-top: 3px solid #10b981;
}

.regular-chat {
    border-top: 3px solid #4a90e2;
}

.room-chat {
    border-top: 3px solid #e74c3c;
}

.job-chat {
    border-top: 3px solid #9b59b6;
}

.chat-box h3 {
    margin-bottom: 16px;
    font-size: 1.1em;
    font-weight: 600;
}

.system-chat h3 {
    color: #10b981;
}

.regular-chat h3 {
    color: #4a90e2;
}

.room-chat h3 {
    color: #e74c3c;
}

.job-chat h3 {
    color: #9b59b6;
}

.input-form {
    display: flex;
    gap: 8px;
    margin-bottom: 16px;
}

.input-form input {
    flex: 1;
    padding: 10px 12px;
    border: 1px solid #ddd;
    border-radius: 6px;
    font-size: 14px;
    outline: none;
    transition: border-color 0.2s;
}

.input-form input:focus {
    border-color: #4a90e2;
}

.system-chat .input-form input:focus {
    border-color: #10b981;
}

.input-form button {
    padding: 10px 16px;
    background: #4a90e2;
    color: white;
    border: none;
    border-radius: 6px;
    font-weight: 500;
    cursor: pointer;
    transition: background-color 0.2s;
}

.system-chat .input-form button {
    background: #10b981;
}

.input-form button:hover {
    background: #357abd;
}

.system-chat .input-form button:hover {
    background: #059669;
}

.messages {
    height: 280px;
    overflow-y: auto;
    background: #f9f9f9;
    border-radius: 6px;
    padding: 12px;
    border: 1px solid #e0e0e0;
}

.messages::-webkit-scrollbar {
    width: 4px;
}

.messages::-webkit-scrollbar-track {
    background: #f1f1f1;
}

.messages::-webkit-scrollbar-thumb {
    background: #ccc;
    border-radius: 2px;
}

.messages li {
    list-style: none;
    padding: 8px 12px;
    margin: 6px 0;
    border-radius: 8px;
    max-width: 80%;
    word-wrap: break-word;
    font-size: 14px;
}

.system {
    background: #10b981;
    color: white;
    font-weight: 500;
    margin-left: auto;
}

.user-message {
    background: #e9ecef;
    color: #495057;
    margin-right: auto;
}

.chat {
    background: #4a90e2;
    color: white;
    margin-left: auto;
}

.notification {
    background: #f39c12;
    color: white;
    margin-left: auto;
}

.reliable {
    background: #27ae60;
    color: white;
    margin-left: auto;
}

.analytics {
    background: #9b59b6;
    color: white;
    margin-left: auto;
}

.room {
    background: #e74c3c;
    color: white;
    margin-left: auto;
}

.job {
    background: #9b59b6;
    color: white;
    margin-left: auto;
}

.room-controls, .job-controls {
    display: flex;
    gap: 8px;
    margin-bottom: 16px;
    align-items: center;
}

.room-controls input {
    flex: 1;
    padding: 8px 12px;
    border: 1px solid #ddd;
    border-radius: 6px;
    font-size: 14px;
}

.room-controls button, .job-controls select {
    padding: 8px 12px;
    border: 1px solid #ddd;
    border-radius: 6px;
    font-size: 14px;
    cursor: pointer;
}

.room-controls button {
    background: #e74c3c;
    color: white;
    border: none;
}

.room-controls button:hover {
    background: #c0392b;
}

.job-controls select {
    background: white;
}

@media (max-width: 768px) {
    .chat-container {
        grid-template-columns: 1fr;
        gap: 16px;
    }

    body {
        padding: 12px;
    }

    h1 {
        font-size: 1.6em;
    }
}
This provides all the styles needed for the tutorial application including responsive layout, chat boxes, input forms, and message styling.
Setting Up Channel Layers
Channel layers enable cross-process communication and group messaging in Fast Channels. Let’s set them up now so they’re ready when we need them in later tutorial sections.
Create a sandbox/layers.py file:
# sandbox/layers.py
"""
Channel layer definitions and registration.
This file centralizes all channel layer configuration for the application.
"""

import os

from fast_channels.layers import (
    InMemoryChannelLayer,
    has_layers,
    register_channel_layer,
)
from fast_channels.layers.redis import (
    RedisChannelLayer,
    RedisPubSubChannelLayer,
)

def setup_channel_layers():
    """
    Set up and register all channel layers for the application.
    This should be called once during application startup.
    """
    # Prevent duplicate registration
    if has_layers():
        return

    # Get Redis URL from environment or use default
    redis_url = os.getenv("REDIS_URL", "redis://localhost:6399")

    # Create different types of layers for different use cases
    layers_config = {
        # In-memory layer for development/testing
        "memory": InMemoryChannelLayer(),

        # Redis Pub/Sub layer for real-time messaging (low latency)
        "chat": RedisPubSubChannelLayer(
            hosts=[redis_url],
            prefix="chat"
        ),

        # Redis Queue layer for reliable messaging (guaranteed delivery)
        "queue": RedisChannelLayer(
            hosts=[redis_url],
            prefix="queue",
            expiry=900,    # 15 minutes
            capacity=1000,
        ),

        # Notifications layer
        "notifications": RedisPubSubChannelLayer(
            hosts=[redis_url],
            prefix="notify"
        ),

        # Analytics layer for metrics/events
        "analytics": RedisChannelLayer(
            hosts=[redis_url],
            prefix="analytics",
            expiry=3600,   # 1 hour
            capacity=5000,
        ),
    }

    # Register all layers
    for alias, layer in layers_config.items():
        register_channel_layer(alias, layer)
Understanding the Layer Types:
memory: For testing and development (single-process only)
chat: For real-time chat (Redis Pub/Sub - low latency, no persistence)
queue: For reliable messaging (Redis Queue - persistent, guaranteed delivery)
notifications: For real-time notifications (Redis Pub/Sub)
analytics: For analytics events (Redis Queue with longer expiry)
Note: The Redis URL uses port 6399 to match our Docker Compose configuration. For detailed information about channel layers, see the Channel Layer Setup Guide guide.
Testing Your Setup
Let’s test that everything is working:
Start your FastAPI application:
uvicorn sandbox.main:app --reload --port 8080
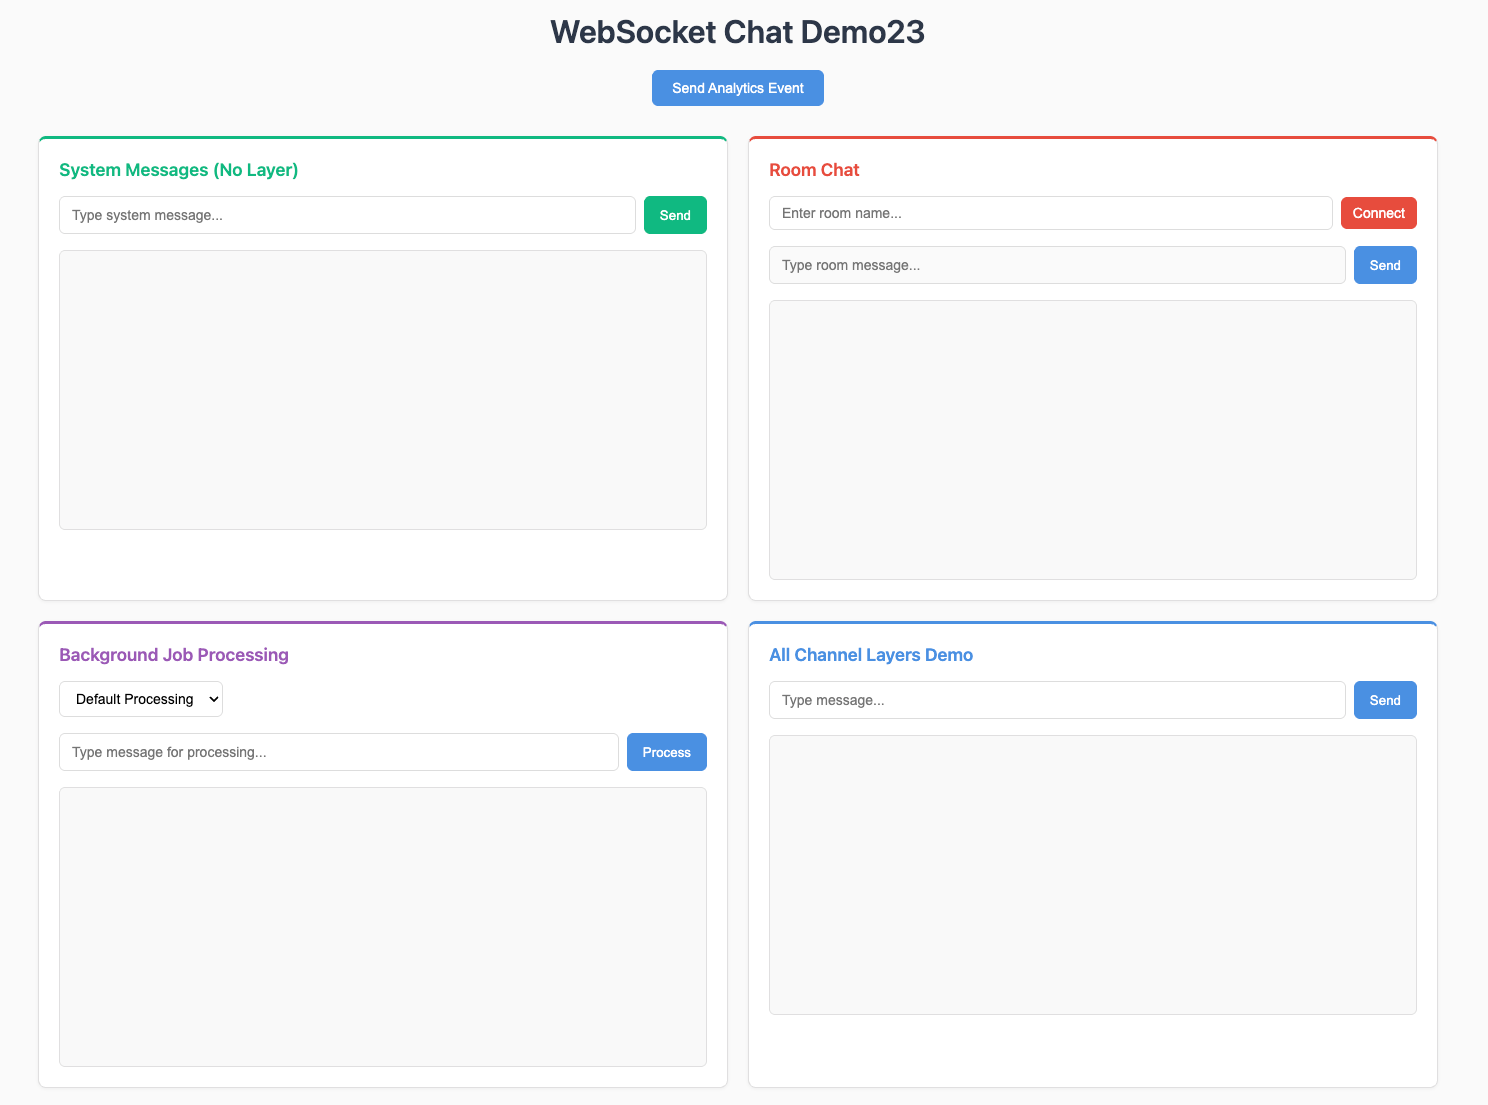
Visit your application:
Open your browser and go to http://localhost:8080. You should see your basic FastAPI application.
Troubleshooting
Common Issues:
- Port Already in Use:
If port 8080 is busy, change the port in the uvicorn command:
uvicorn sandbox.main:app --reload --port 8000. You’ll also need to update the WebSocket URLs insandbox/static/js/main.jsto match the new port (e.g., changews://localhost:8080tows://localhost:8000)- Redis Connection Issues:
Make sure Docker is running and the Redis container started successfully with
docker compose ps- Import Errors:
Ensure you’re in the correct directory and your virtual environment is activated
- Docker Permission Issues:
On Linux, you might need to run Docker commands with
sudoor add your user to the docker group
Next Steps
Great! You now have:
✅ A working FastAPI application
✅ Fast Channels installed with Redis support
✅ Redis running in Docker
✅ Basic project structure and styles
You’re ready to start building WebSocket consumers! In the next section, we’ll create our first WebSocket consumer without channel layers to understand the basics.
Continue to System Messages to build your first WebSocket consumer.